Android Splash Screen
Most Android Apps uses Android Splash Screen before launching application Activity. Android splash screen is used to display a logo or company name or brand for an app. In this blog we are going to discuss about implementing an Android Splash Screen.
1. Android Splash screen
Create a new project in Android Stuido.
File --> New Android -->Application Project
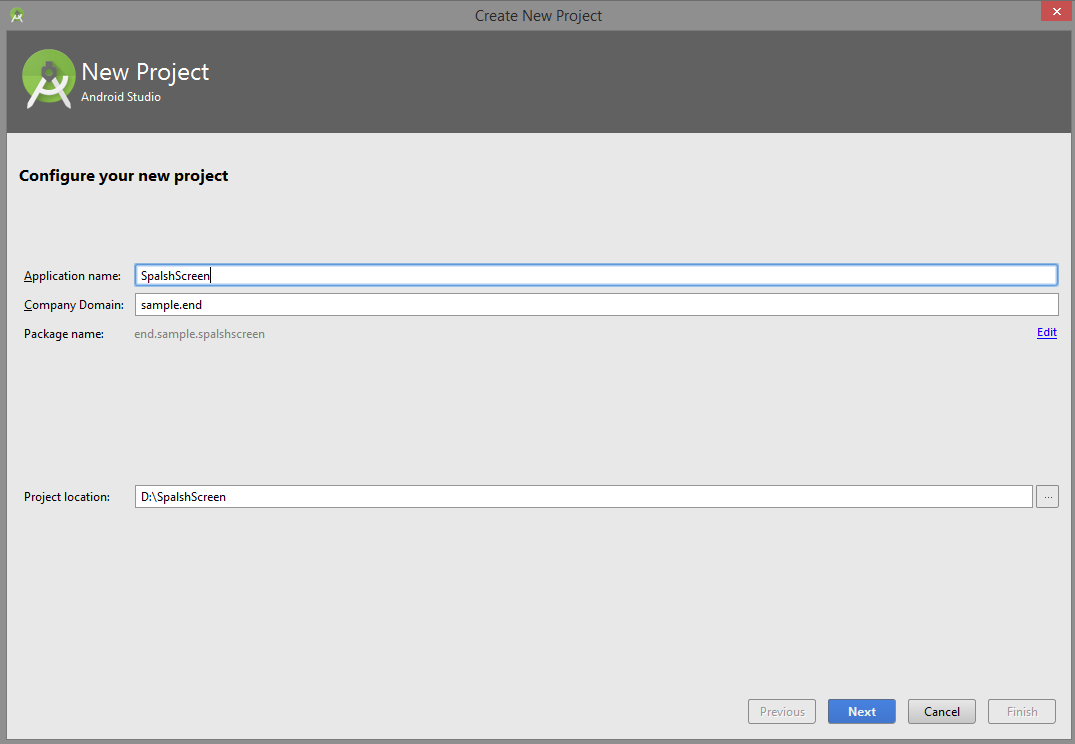
Next, Select Target Device

After that, Select Activity

And then Click finish.
For Splash Screen we are creating a SplashActivity. Create a new class in your package and name it as SplashAcivity.java.
Open Manifest.xml, and make your splash screen activity as Launcher activity.
<activity android:name=".SpalshActivity">
<intent-filter>
<action android:name="android.intent.action.MAIN" />
<category android:name="android.intent.category.LAUNCHER" />
</intent-filter>
</activity>
<activity android:name=".MainActivity"/>
2. Now, create a activity layout file for Splash Screen and write this code.
activity_spalsh.xml
<?xml version="1.0" encoding="utf-8"?>
<RelativeLayout xmlns:android="http://schemas.android.com/apk/res/android"
android:orientation="vertical" android:layout_width="match_parent"
android:layout_height="match_parent">
<ImageView
android:src="@drawable/ic_launcher"
android:layout_width="match_parent"
android:layout_height="match_parent" />
<TextView
android:text="Spalsh Screen"
android:textSize="20sp"
android:textColor="#000000"
android:gravity="center"
android:layout_width="match_parent"
android:layout_height="wrap_content"
android:layout_alignParentBottom="true"/>
</RelativeLayout>
3.In SplashActivity.java
Declare a variable for time
private static int TIME_DONE = 4000;
in OnCreate() method, write this
new Handler().postDelayed(new Runnable() {
@Override
public void run() {
// This method will be executed once the timer is over
// Start your app main activity
Intent i = new Intent(SpalshActivity.this, MainActivity.class);
startActivity(i);
// close this activity
finish();
}
}, TIME_DONE);
Full Code:
activity_splash:
<?xml version="1.0" encoding="utf-8"?>
<RelativeLayout xmlns:android="http://schemas.android.com/apk/res/android"
android:orientation="vertical" android:layout_width="match_parent"
android:layout_height="match_parent">
<ImageView
android:src="@drawable/ic_launcher"
android:layout_width="match_parent"
android:layout_height="match_parent" />
<TextView
android:text="Spalsh Screen"
android:textSize="20sp"
android:textColor="#000000"
android:gravity="center"
android:layout_width="match_parent"
android:layout_height="wrap_content"
android:layout_alignParentBottom="true"/>
</RelativeLayout>
SpalshActivity.java:
import android.app.Activity;
import android.content.Intent;
import android.os.Bundle;
import android.os.Handler;
public class SpalshActivity extends Activity {
private static int TIME_DONE = 4000;
@Override
protected void onCreate(Bundle savedInstanceState) {
super.onCreate(savedInstanceState);
setContentView(R.layout.activity_spalsh);
new Handler().postDelayed(new Runnable() {
/*
* Showing splash screen with a timer. This will be useful when you
* want to show case your app logo / company
*/
@Override
public void run() {
// This method will be executed once the timer is over
// Start your app main activity
Intent i = new Intent(SpalshActivity.this, MainActivity.class);
startActivity(i);
// close this activity
finish();
}
}, TIME_DONE);
}
}
activity_main.xml:
<?xml version="1.0" encoding="utf-8"?>
<RelativeLayout xmlns:android="http://schemas.android.com/apk/res/android"
xmlns:tools="http://schemas.android.com/tools"
android:layout_width="match_parent"
android:layout_height="match_parent"
tools:context="end.sample.webviewandroid.MainActivity">
<TextView
android:textSize="20sp"
android:textColor="#000000"
android:text="Welcome to MainActivity"
android:gravity="center"
android:layout_width="match_parent"
android:layout_height="match_parent" />
</RelativeLayout>
MainActivity.java:
import android.support.v7.app.AppCompatActivity;
import android.os.Bundle;
public class MainActivity extends AppCompatActivity {
@Override
protected void onCreate(Bundle savedInstanceState) {
super.onCreate(savedInstanceState);
setContentView(R.layout.activity_main);
}
}
Mainfest.xml:
<?xml version="1.0" encoding="utf-8"?>
<manifest xmlns:android="http://schemas.android.com/apk/res/android"
package="end.sample.android">
<application
android:allowBackup="true"
android:icon="@mipmap/ic_launcher"
android:label="@string/app_name"
android:supportsRtl="true"
android:theme="@style/AppTheme">
<activity android:name=".SpalshActivity">
<intent-filter>
<action android:name="android.intent.action.MAIN" />
<category android:name="android.intent.category.LAUNCHER" />
</intent-filter>
</activity>
<activity android:name=".MainActivity"/>
</application>
</manifest>
3. Now run the code.
4. Output:
Output will be like this,

After 4 seconds automatically go to MainActivity.java
